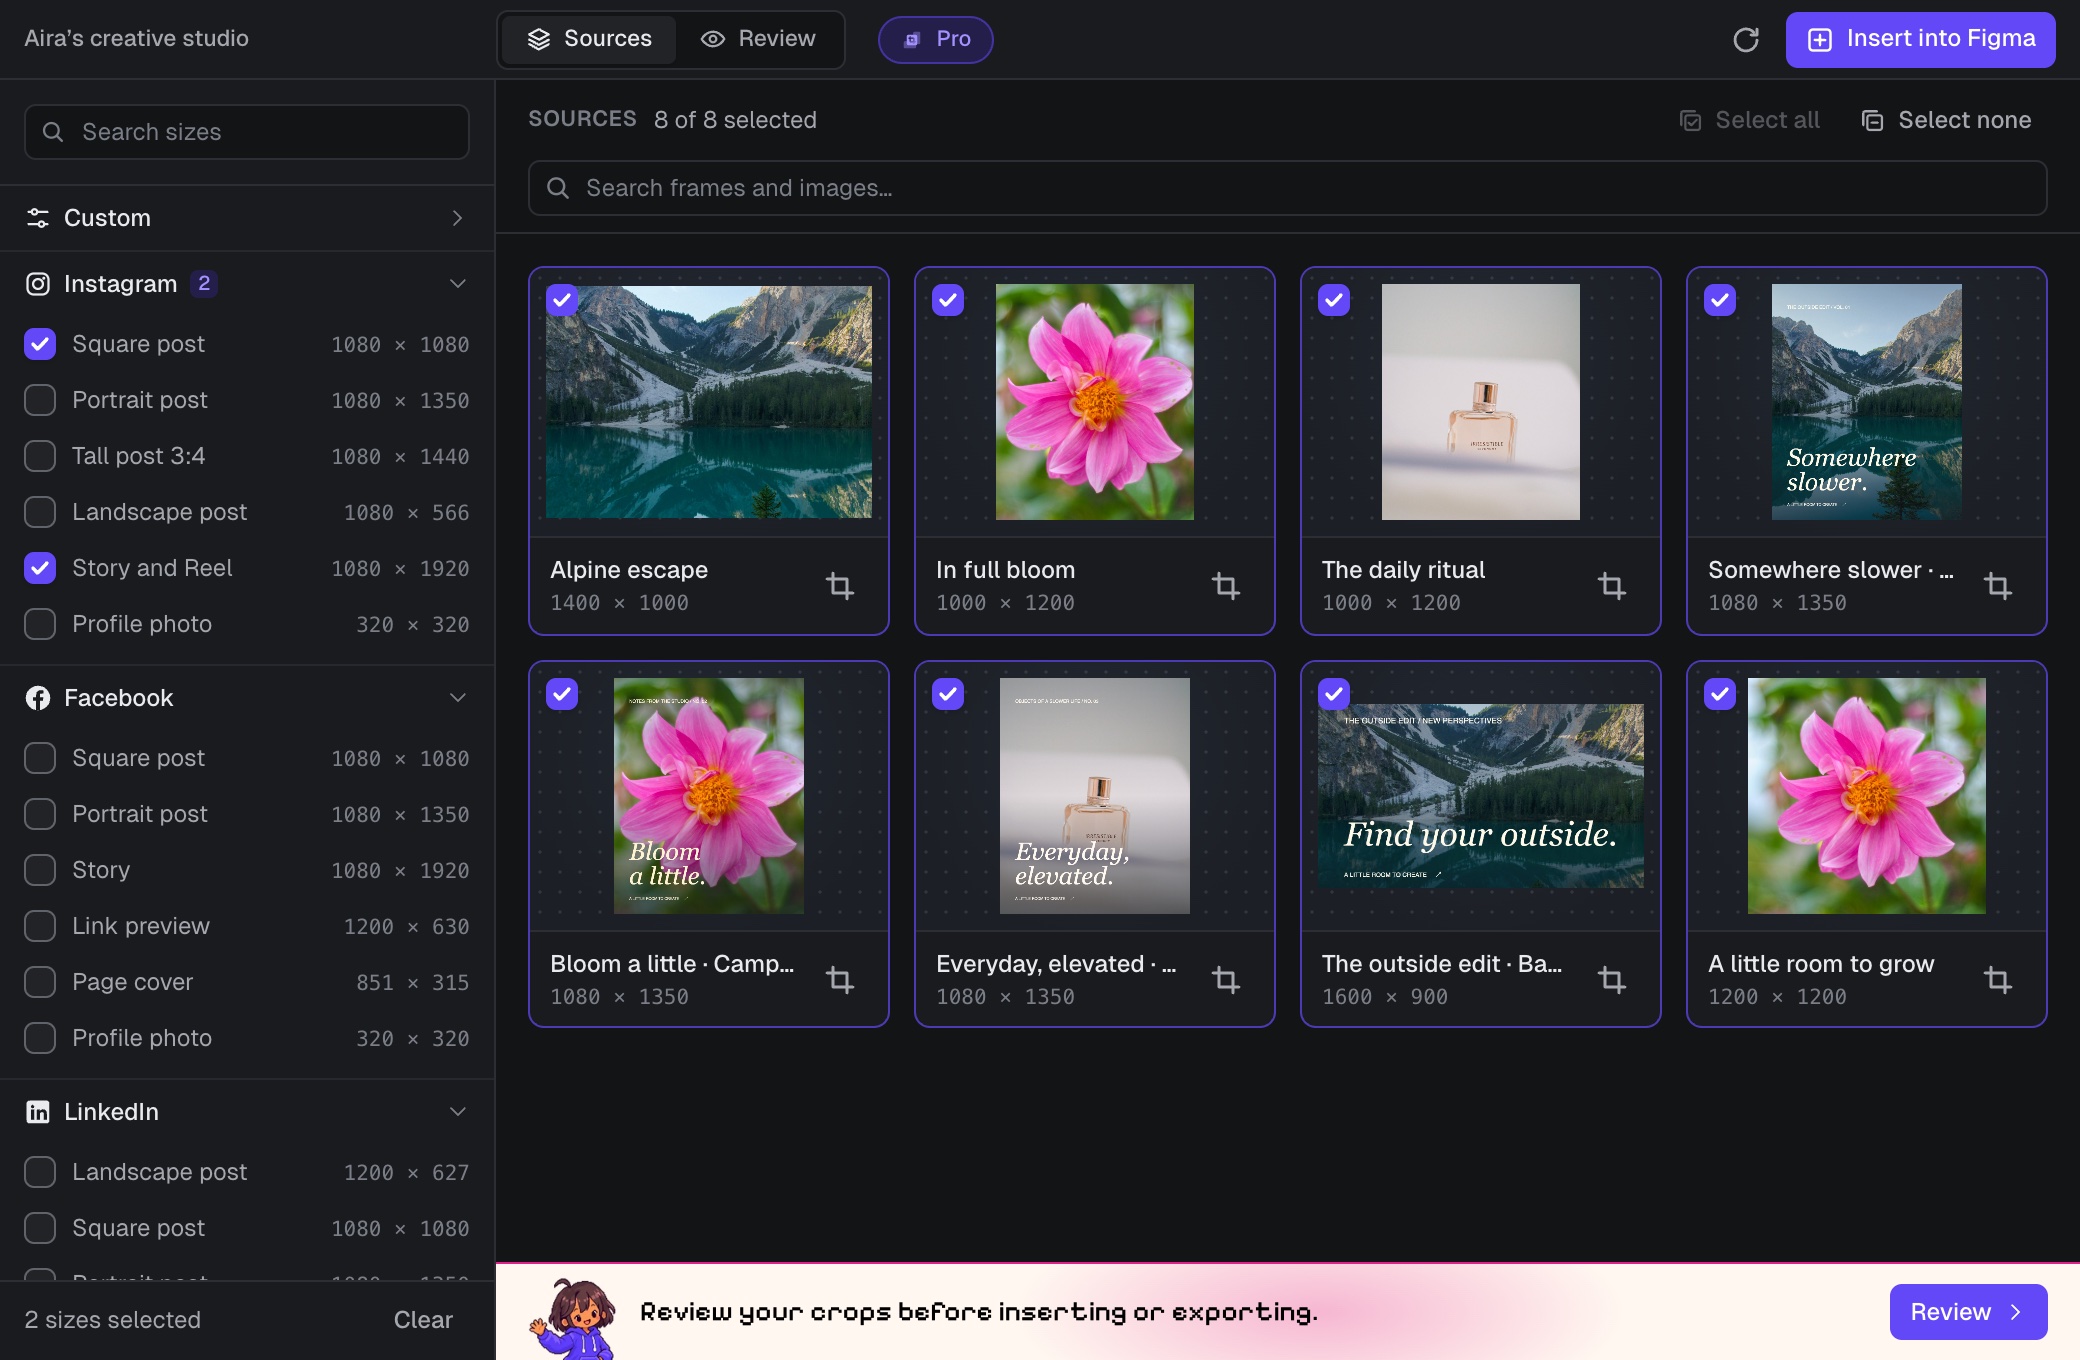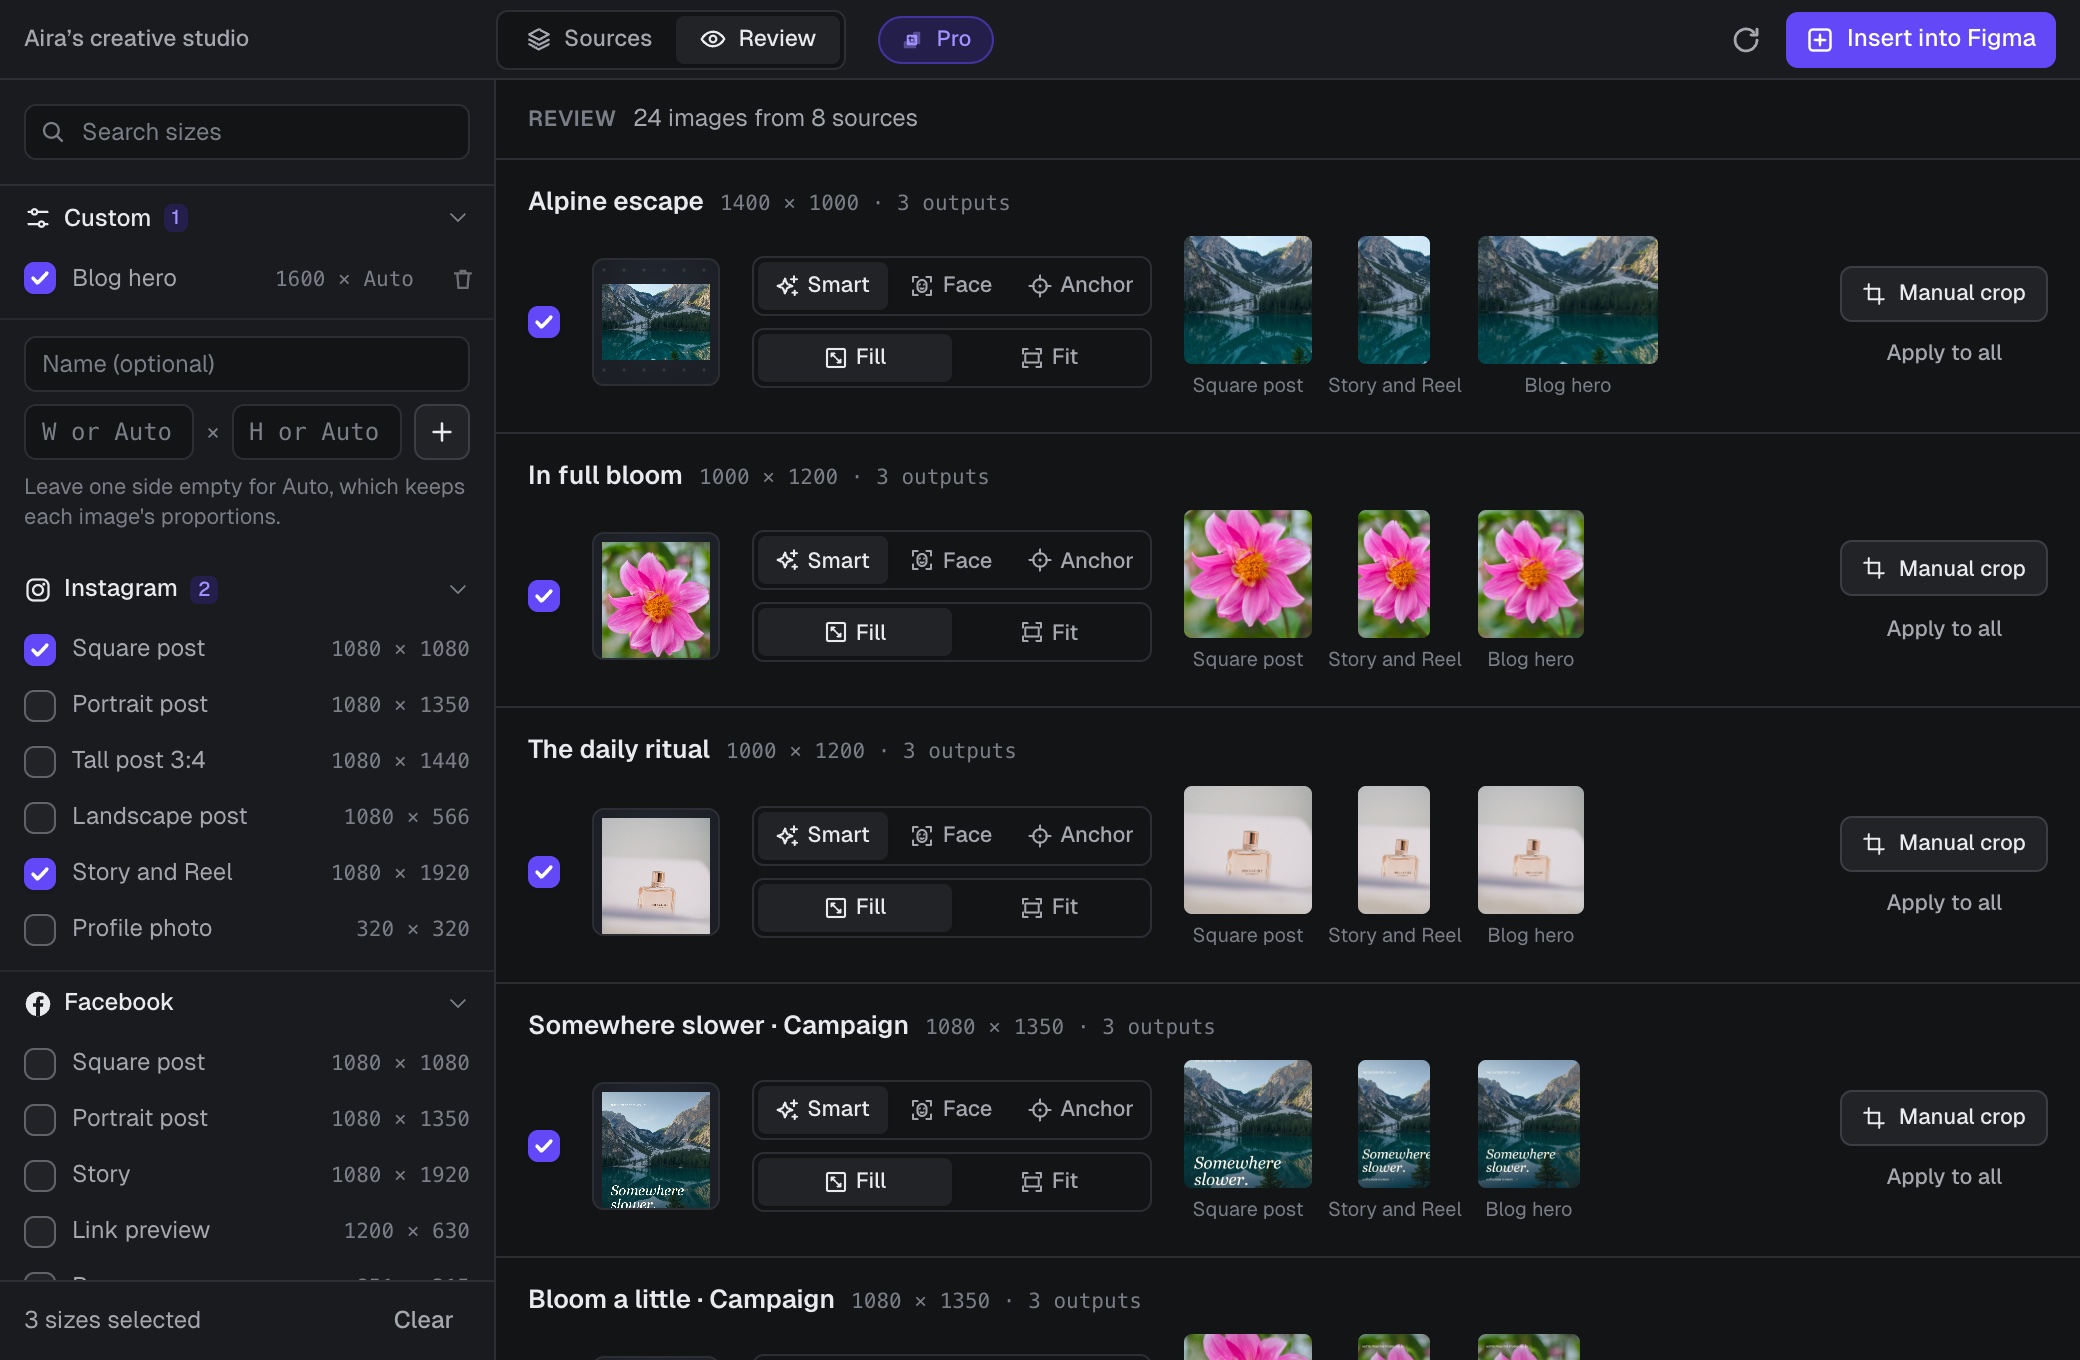
To batch crop multiple images in Figma with Croppy, choose the source images, tick your output sizes and open Review. Adjust Fill, Fit and focus for each source, then export a ZIP or insert the results into Figma.
Imagine you have five campaign images. Each needs a square post and a tall story version. That is ten crops to prepare. Croppy lets you set up those sizes once, check the results together and run the batch.
Crop or resize: which do you need?
Resizing changes the output dimensions. Cropping also changes which part of the image is visible. A wide photo cannot become a tall image without losing some content, adding empty space or being stretched.
- Use Fill to crop. The image covers the output. Anything outside its edges is cut off.
- Use Fit to keep the whole image. The output can have empty space around the image.
- Use Auto for proportional resizing. Fix one dimension and let the other follow the source.
For one image on the canvas, Figma's own Crop tool lets you drag the crop handles and reposition the picture. The steps below use Croppy for a set of images and several output sizes.
1. Select the images for your batch
Open a Figma Design file and run Croppy from Tools. The Sources tab shows the frames and images it finds on the current page. Tick the ones you want to include.
To work on a few layers, select them on the canvas first and run Crop Selection. This is useful for an image nested inside a larger design. The selection bar shows which layers the run is using.
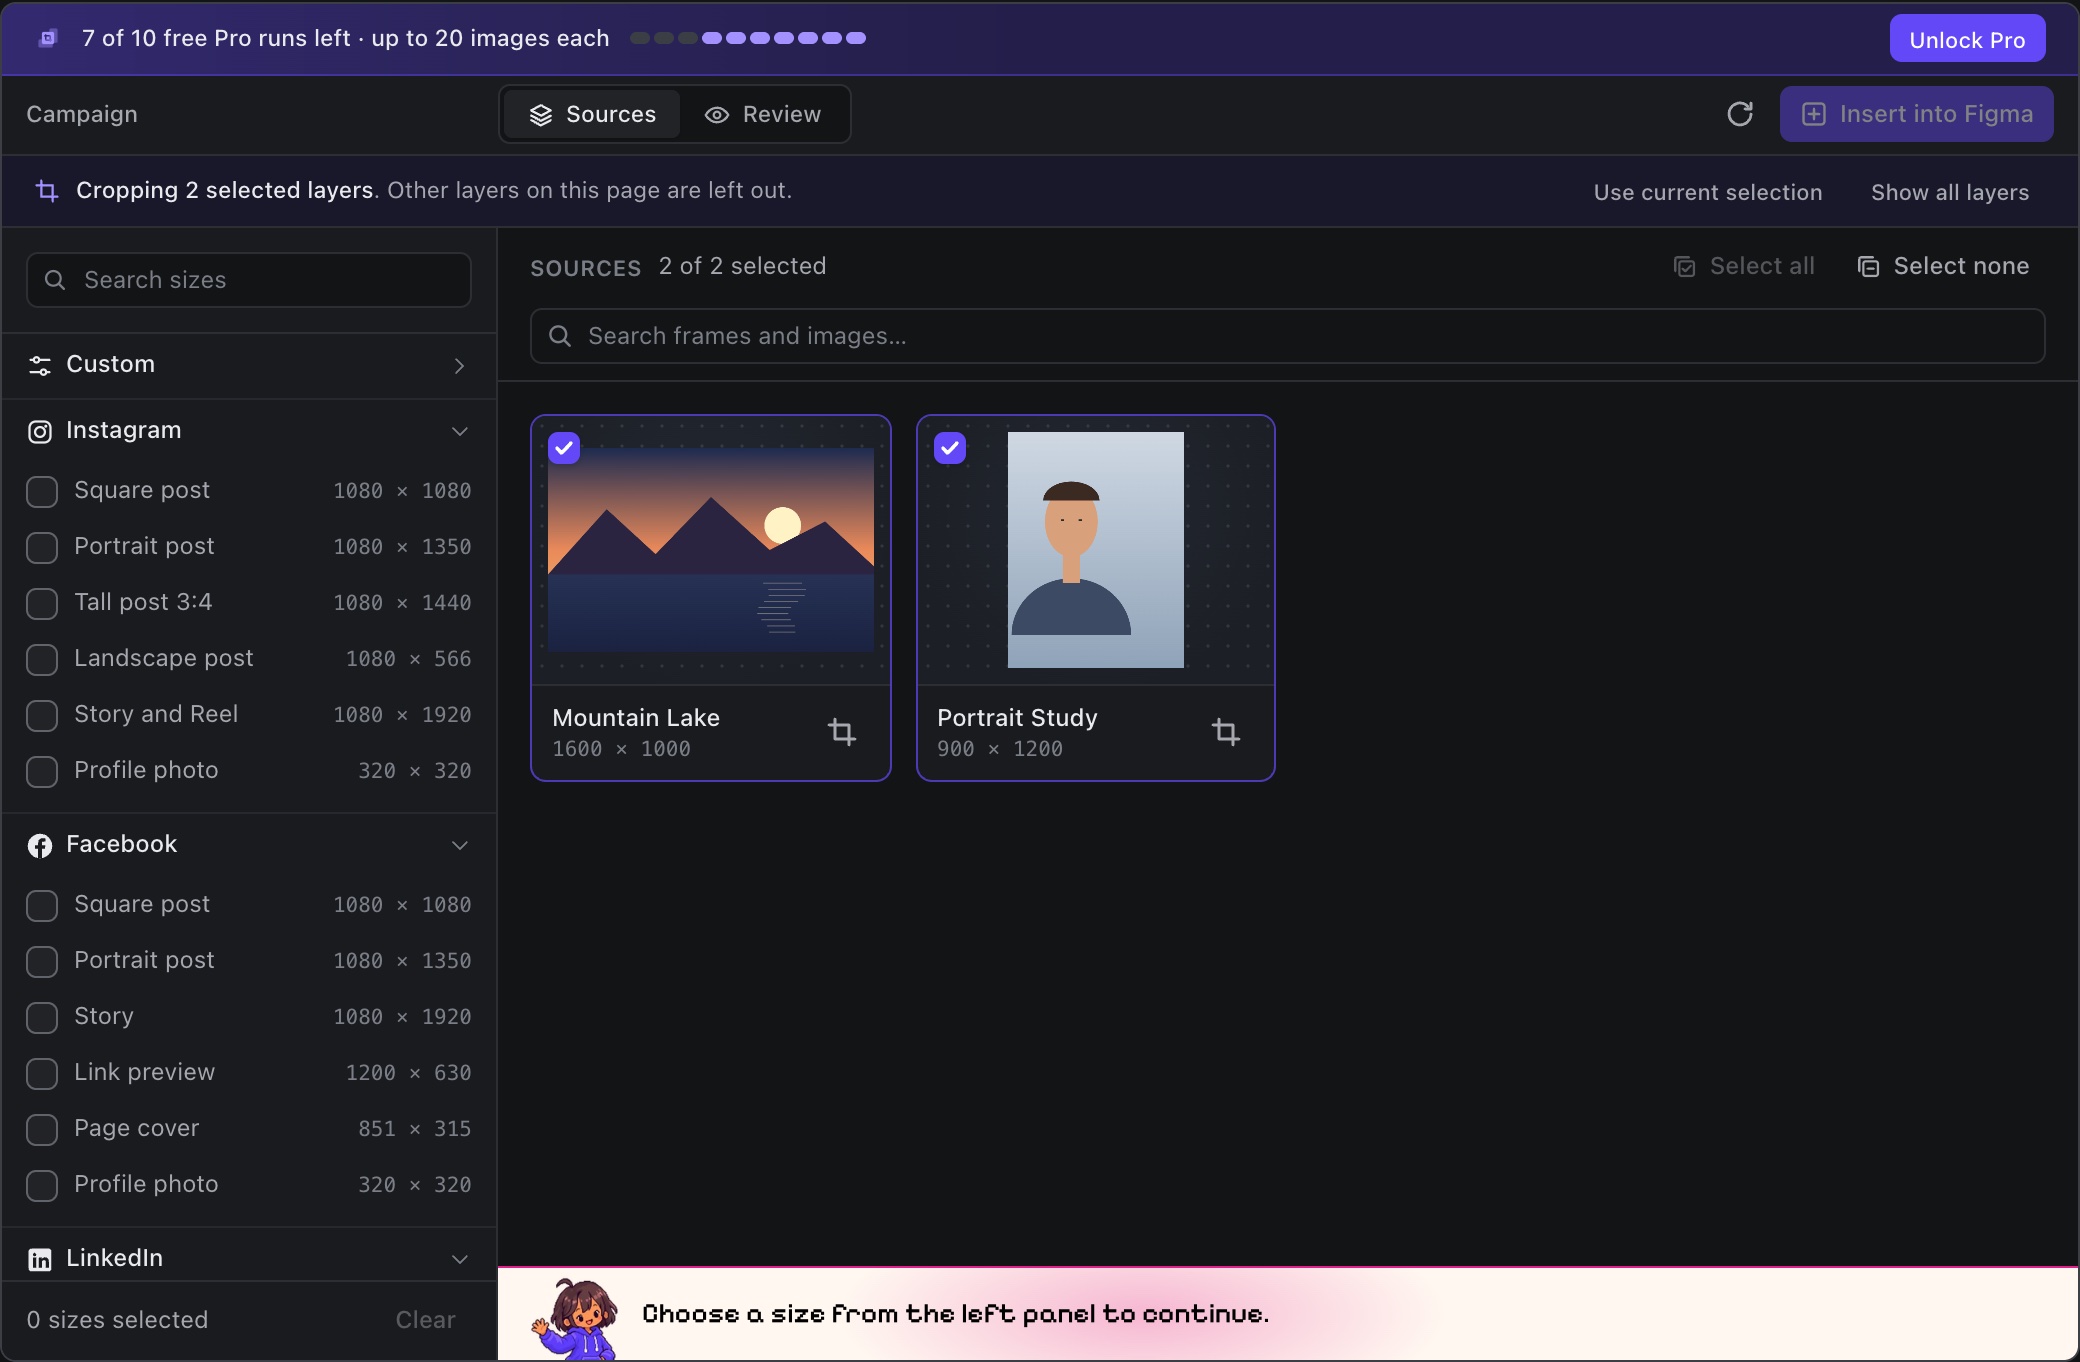
Choose the whole frame when you want its photo, text and other elements in the same output. Choose an image layer when you only want that image. See how Croppy finds sources if an item is missing.
2. Pick sizes for the whole batch
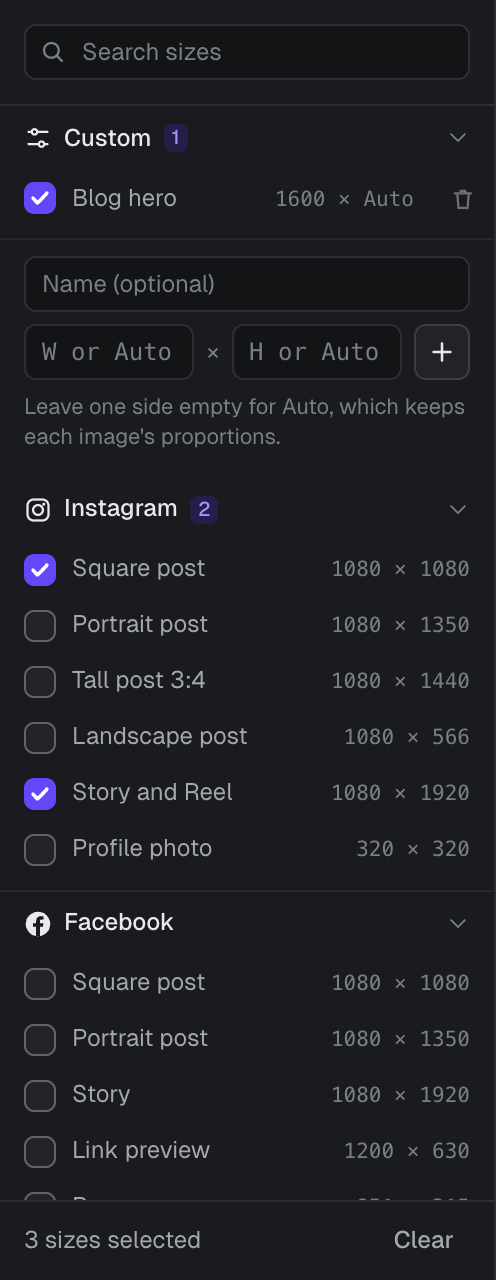
In the size sidebar, open a preset group and tick the outputs you need. For this example, choose Instagram → Square postat 1080 × 1080 and Story and Reel at 1080 × 1920. These are Croppy's preset dimensions. Check the destination's requirements before publishing.
Five selected sources and two selected sizes make ten output images. Every extra size adds another output for each source. Check that total before you start the run.
Add a custom size with width 1600 and height Auto. This keeps each source's proportions at the same output width. Set both dimensions when every file must have the same shape.
Smaller source images may look soft when enlarged. Increasing the output dimensions cannot recover detail that the original does not contain.
3. Review every crop and adjust the focus
Open Review. Each row is one source, with a preview for every size. Croppy starts with Smart focus and Fill. Look at the tall outputs first, since a wide source often loses more content in a portrait crop.
Smart, Face or Anchor?
- Smart looks for an interesting area using edges, skin tones and color. Treat it as a starting point and check the result.
- Face centers the crop around detected faces. Small faces in a wide photo may be missed. Croppy falls back to Smart if it cannot find a face.
- Anchor uses a position you choose, such as Top Center. Use it when the important part is in a predictable place.

A crop can still cut off a person or a headline if the output is too narrow. When all the content matters, switch that source to Fit. Focus is disabled in Fit mode. The anchor controls where the whole image sits within the available space.

Copy settings with Apply to all
If the sources need the same treatment, set up one row and click Apply to all. Confirm to copy its focus, scale and anchor to every included source. It does not copy a hand-drawn crop. Review the other rows after applying it, especially if your batch mixes photos, product shots and text.
4. Export the crops or insert them into Figma
Choose Export ZIP in the header for JPG or PNG downloads. Choose Insert into Figma to add the results to a new page. Each button opens a separate dialog.
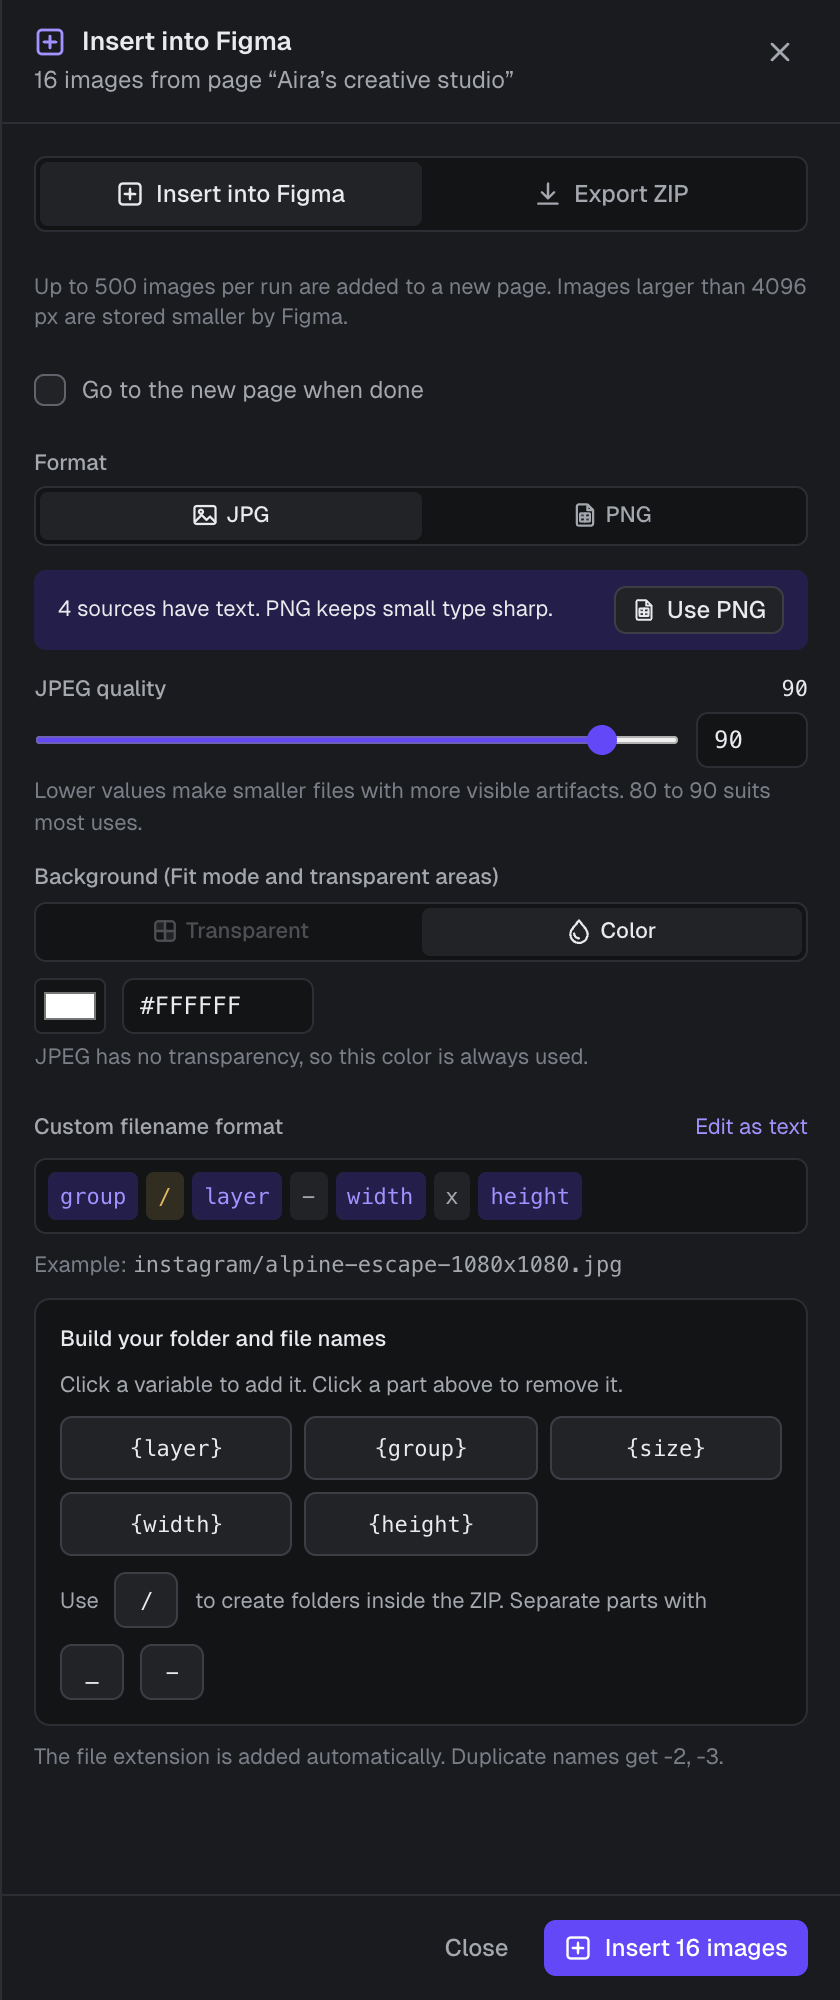
- Use JPG for photos when smaller files matter. Check the quality before sharing.
- Choose PNG for transparency. Croppy selects Transparent automatically, and you can choose a color instead.
- For Fit outputs, check the background that will fill the space around the image.
- Check the output count and file names, then click Download images or Insert images.
Inserting leaves the original layers in place. Go to the new page when done is checked by default. For download settings and ZIP folders, follow how to bulk export images in Figma.
Common questions about batch cropping
Does Croppy change my original images?
The batch creates new output images. It does not replace or resize your source layers on the canvas.
Can I use a different focus for each image?
Yes. Each source has its own focus, scale and anchor settings. The settings apply to that source's selected output sizes.
Can I crop one image by hand?
Yes. Click Manual crop to open the single-image editor and download that crop. It is a separate workflow and stays free. See the manual crop guide.
Why are some outputs missing?
Make sure the source and size are both ticked. Croppy can also skip an output that exceeds its size limits. Review shows the reason. Check the limits guide before making a large batch.