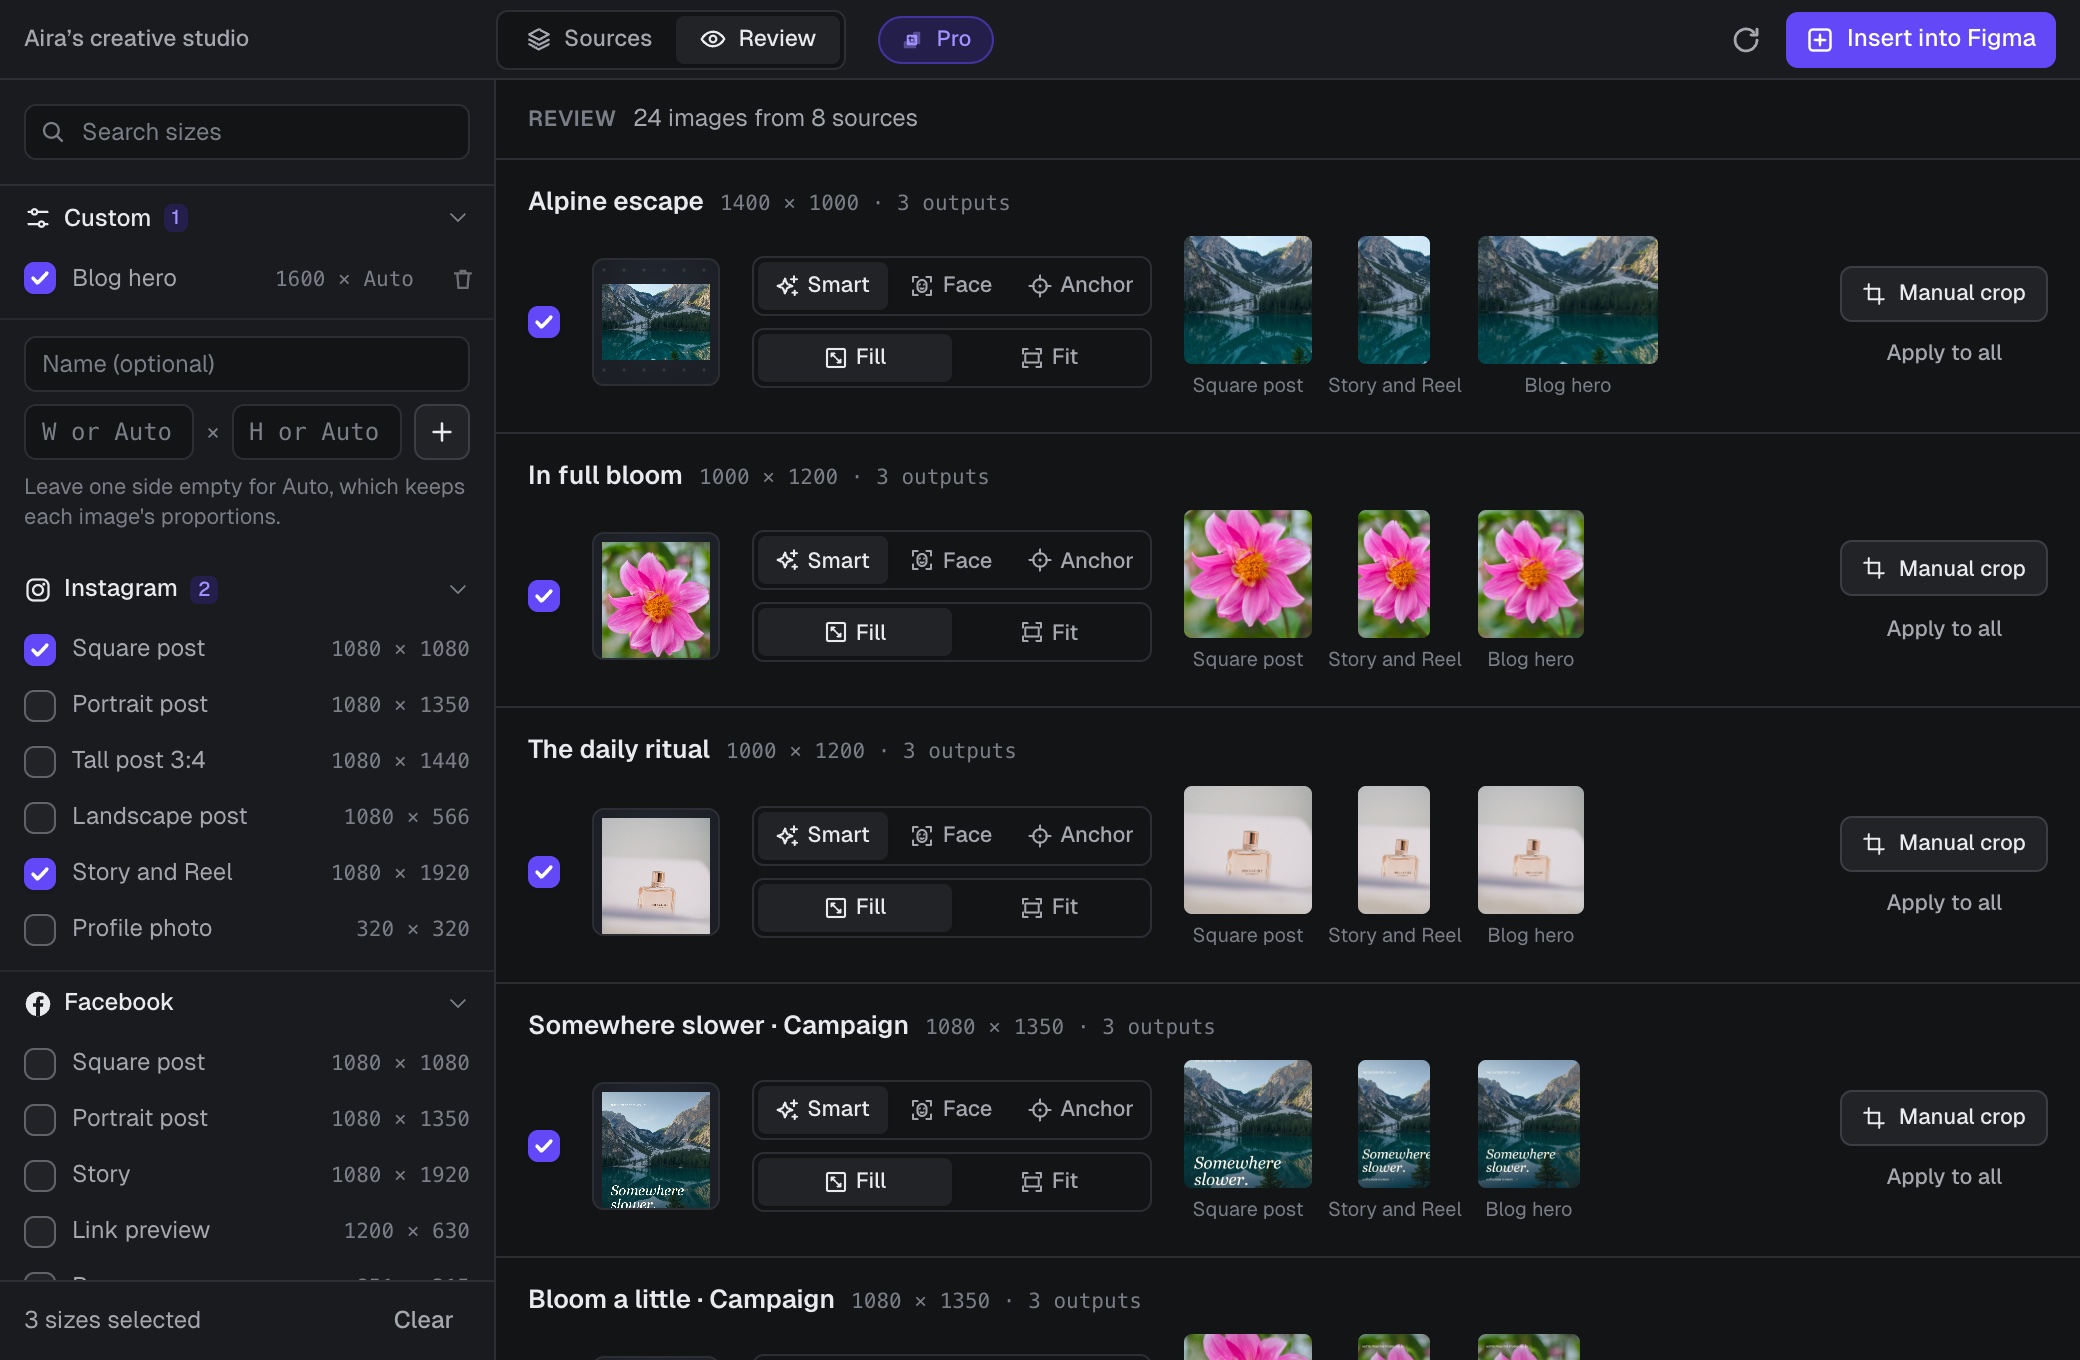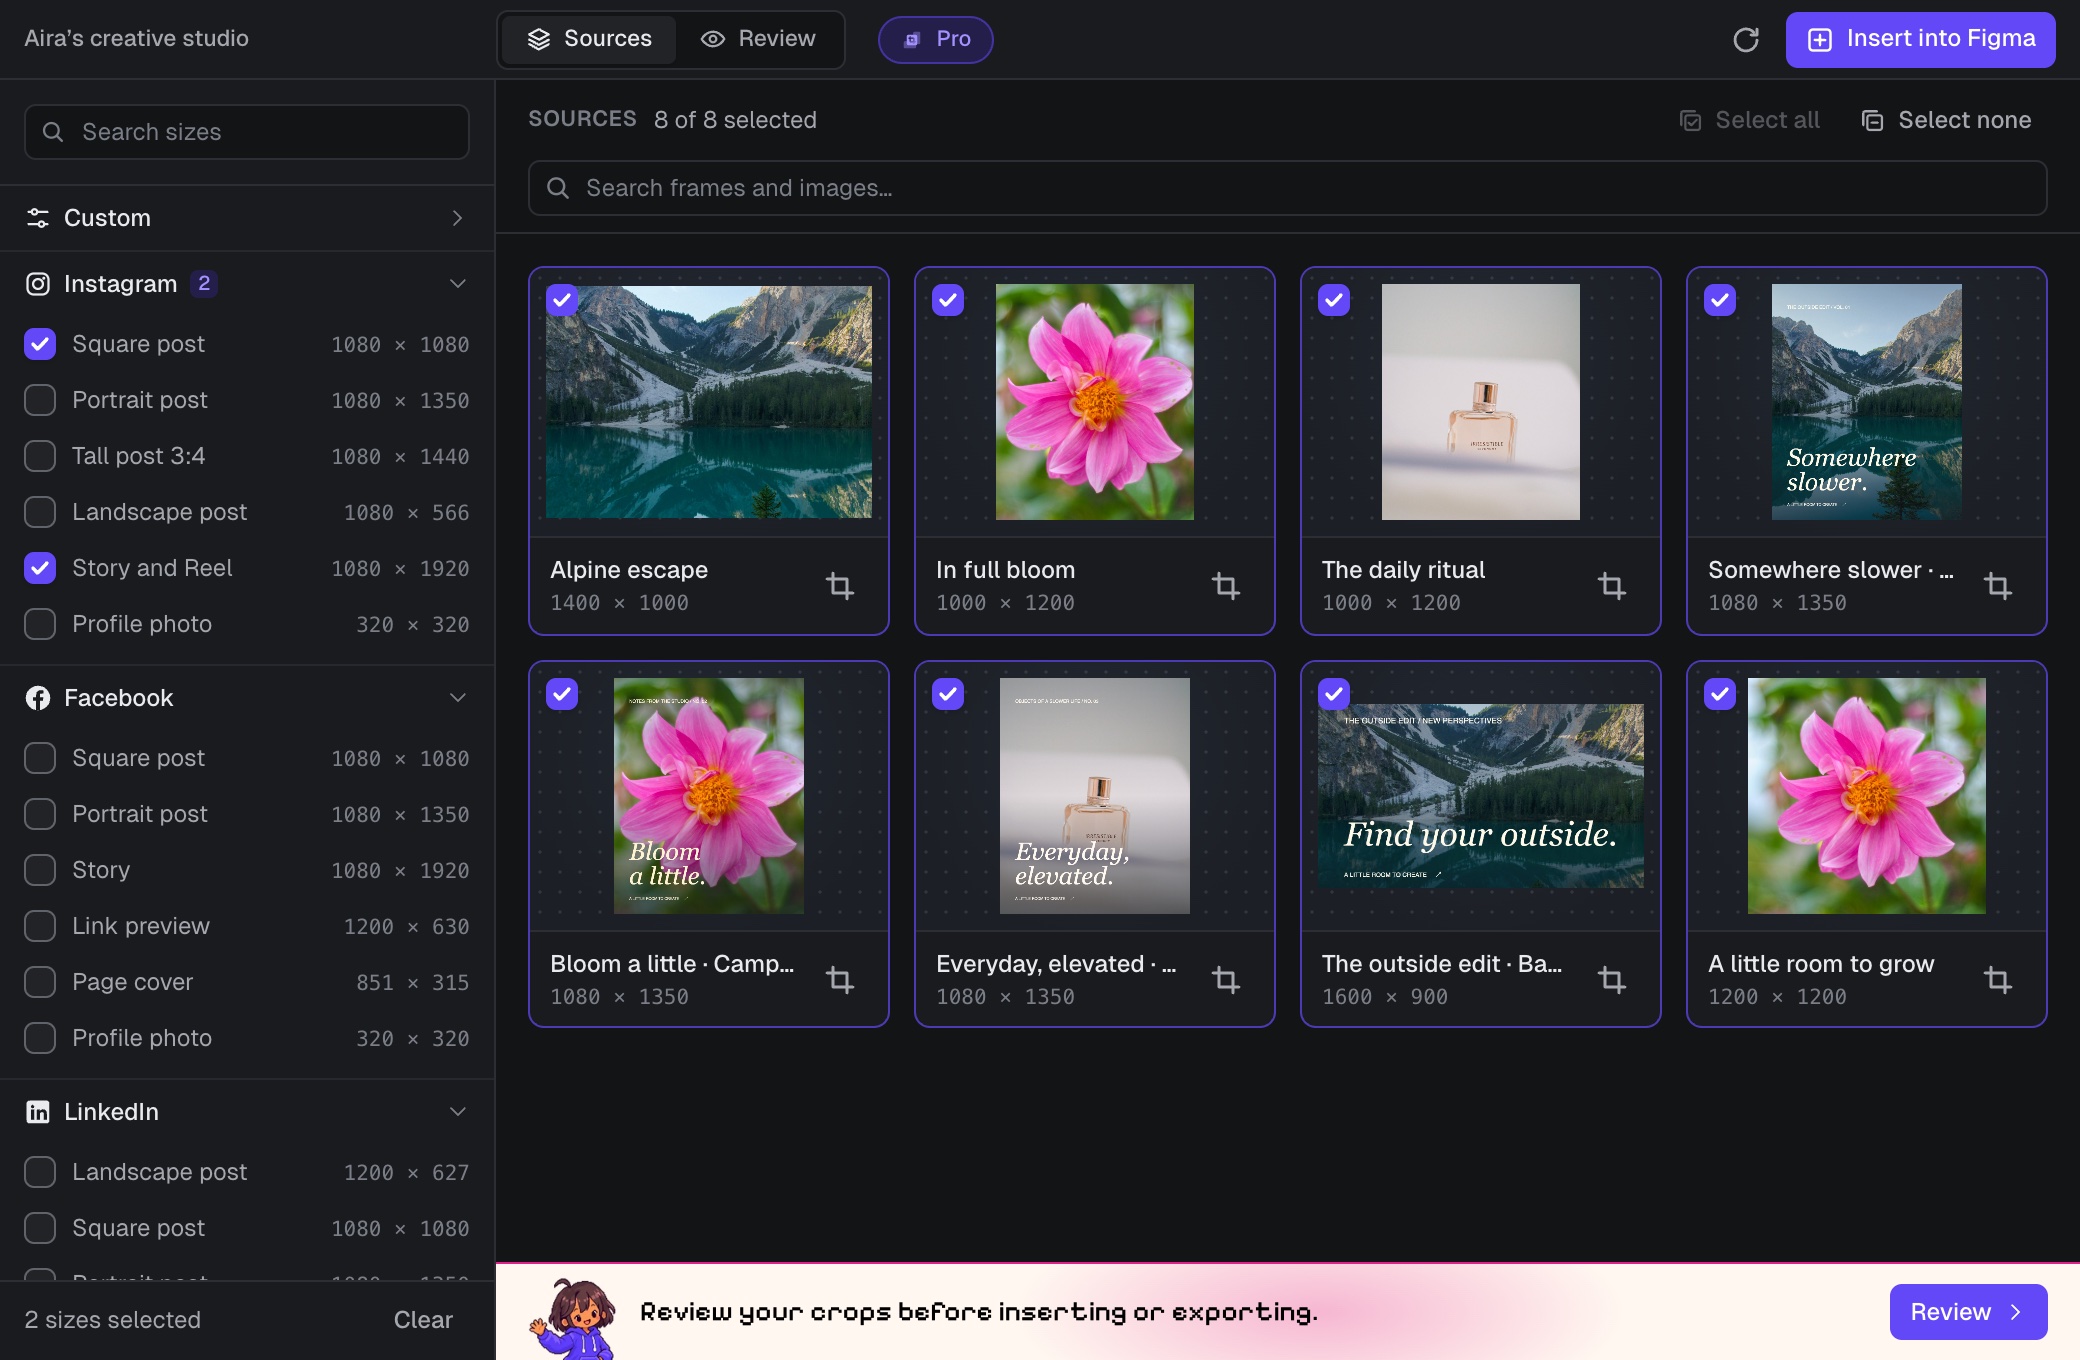
To bulk export images in Figma, select the layers, add an export setting and click Export. For a batch with several crop sizes, open Croppy, choose your sources and sizes, then click Export ZIP.
A simple download can use Figma's own export tools. If you are preparing social posts, ad images or a set of web assets, you may also need new dimensions, smaller files and clear folder names. This guide covers both workflows.
Export multiple images with Figma's built-in tools
Use this method when your frames or layers are already the right shape. Figma can export several selected objects together.
- Select the frames or layers you want to download.
- Find Export in the right sidebar and click +.
- Choose a format, such as PNG or JPG, and set the export scale.
- Click Export to save the selected assets.
To collect assets that already have export settings on the current page, open the main menu and choose File → Export. Untick anything you do not need, then export the rest. Figma explains these controls in its export guide.
Export scale changes the output size in proportion. It does not turn a wide banner into a square crop. For that, prepare a square frame or use a crop workflow such as Croppy.
1. Choose the images you want to export
In a Figma Design file, open Croppy from Tools. If you are new to the plugin, follow the installation guide. Croppy's Sources tab lists the frames and images it finds on your current page.
Tick the sources you need. Use the search field to find a layer by name, or use Select none and build a smaller batch. For a few selected layers, run Croppy's Crop Selection command instead.
A frame is exported as a finished image of its contents. If you want a photo inside that frame on its own, select that image layer and use Crop Selection.
2. Set the output sizes
Tick at least one size in the left sidebar. You can use presets or add a custom width and height. Croppy makes an output for each selected source at each selected size.
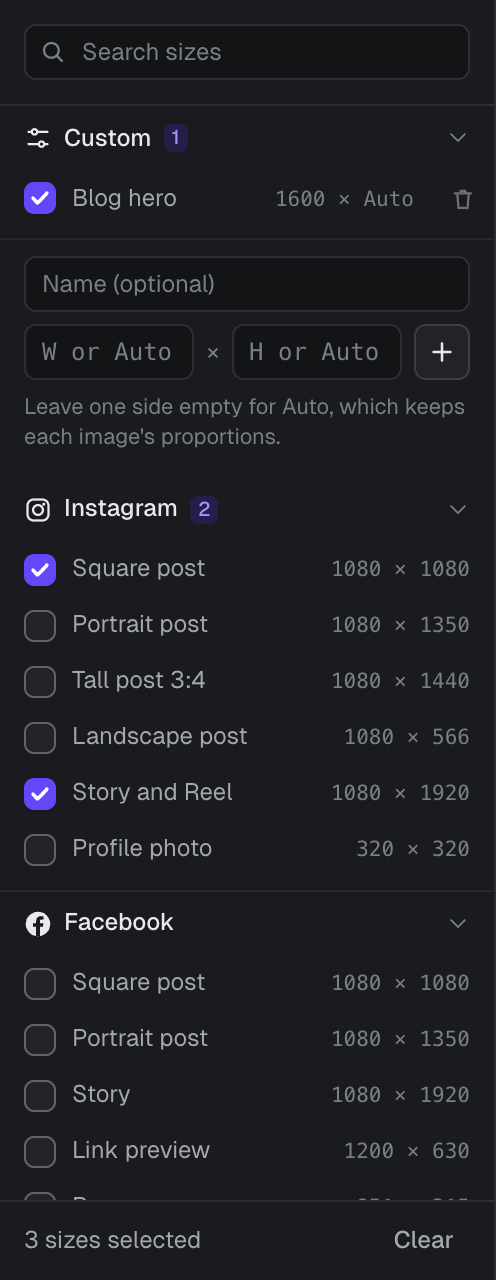
5 images × 2 sizes = 10 output files. A square at 1080 × 1080 and a portrait at 1080 × 1920 give you two versions of every source.
To keep each image's proportions at a fixed width, add a custom size and leave the height on Auto. Set the width to 1600, for example, and each output gets the height its source needs.
Open Review before exporting. If an image is being cut off, adjust its focus or switch to Fit. The batch crop guide explains these choices.
3. Choose JPG or PNG and set the quality
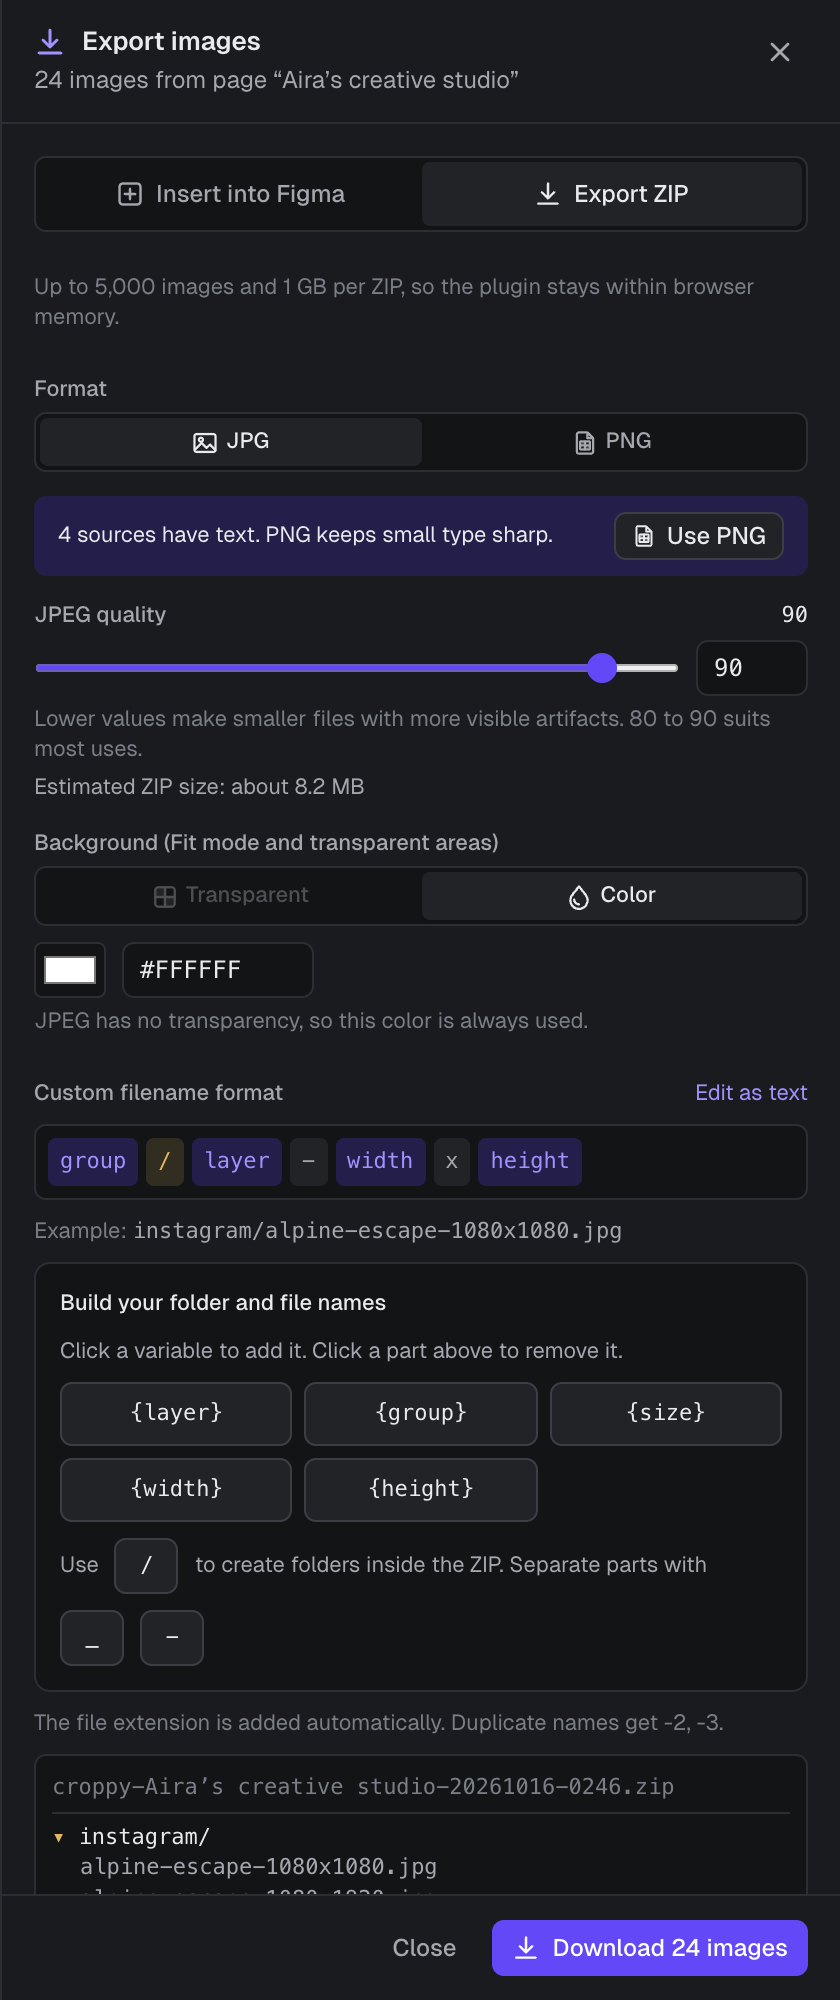
Click Export ZIP at the top right. This opens the Export images dialog. Choose the format before checking the background and file names.
JPG for photos
JPG suits photos when a small download matters. Croppy starts JPEG quality at 90. Try a lower value, then check the detail in a downloaded image before sharing the batch.
The estimated ZIP size helps you judge the tradeoff. It is an estimate, so the final download can differ.
PNG for transparency and sharp graphics
PNG supports transparency. Choosing PNG in Croppy selects Transparent automatically. You can switch back to a color background.
For PNG ZIP exports, Fast and Optimized are both lossless. Optimized can reduce file size further, but takes longer. The saving depends on the image.
JPG cannot keep transparency. If a PNG has a white background, check whether the source frame itself has a white fill. Choosing a transparent export background does not erase content inside the source. See Figma's format guide for its native export options.
4. Name the files and download the ZIP
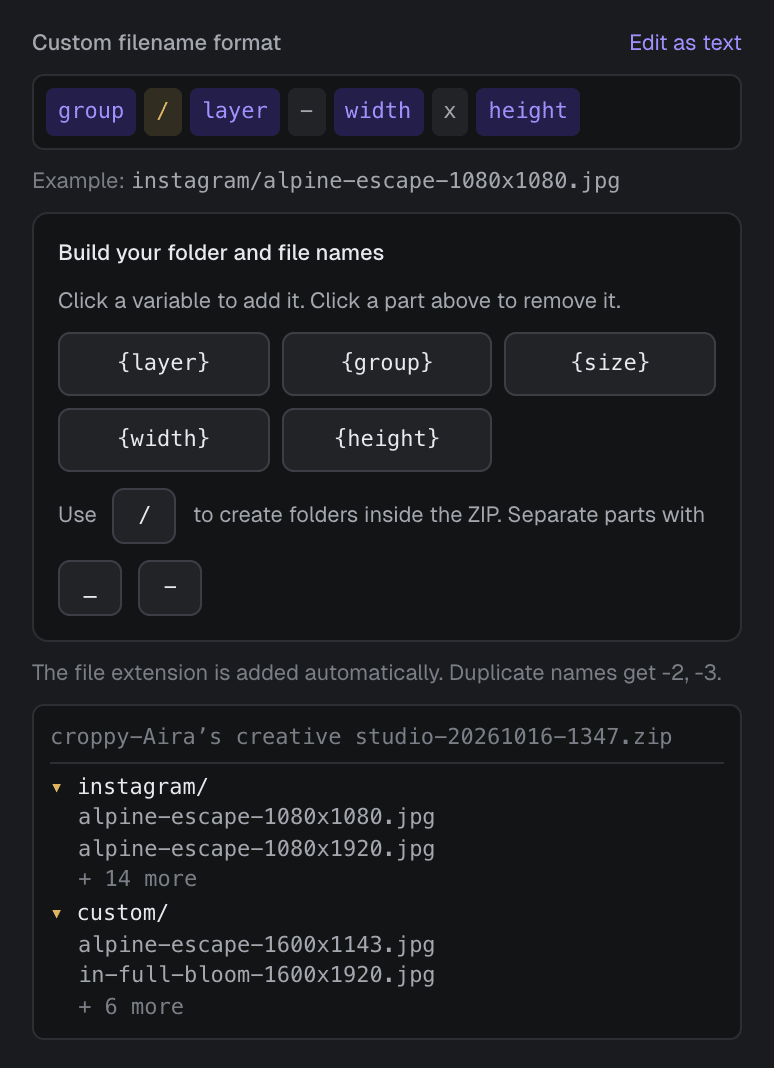
Set Custom filename format before downloading. The default pattern groups files by size group and includes the source name and output dimensions:
{group}/{layer}-{width}x{height}
instagram/alpine-escape-1080x1080.jpg
Use the preview to check the folders and names. You do not need to type the file extension. Croppy adds it. More examples are in the file name guide.
Click Download images. When the run finishes, open the ZIP and check a few images at their full size. Look for sharp text, the right crop and the background you expected.
Common questions about bulk image export
Can I export SVG or PDF with Croppy?
Croppy exports JPG and PNG. Use Figma's built-in export tools for SVG or PDF.
Why is Export ZIP disabled?
Check that at least one source and one output size are selected. A selected source without a size does not make an output.
Can I export thousands of images?
A Croppy ZIP run supports up to 5,000 output images and 1 GB. Your device still needs enough memory. Start with a smaller batch if large sources make a run slow. The free trial allows up to 20 output images per run.
Can I put the results back into Figma?
Yes. Choose Insert into Figma in the header instead of Export ZIP. It opens its own dialog and adds results to a new page. Read the insert and export guide for the limits and settings.