Insert and export
Put your finished images on a new Figma page, or download them all as a ZIP of JPG or PNG files.
Start a run
- Pick at least one source and one size. Checking the Review tab first is a good idea.
- Click Insert into Figma at the top right.
- Choose a tab: Insert into Figma or Export ZIP.
- Check the format, background and file names.
- Click Insert images or Download images. The button shows how many images the run will make.
A progress bar shows each image as it is made. Click Cancel at any time. Nothing is saved from a cancelled run, and a half-finished page is removed.
Insert into Figma
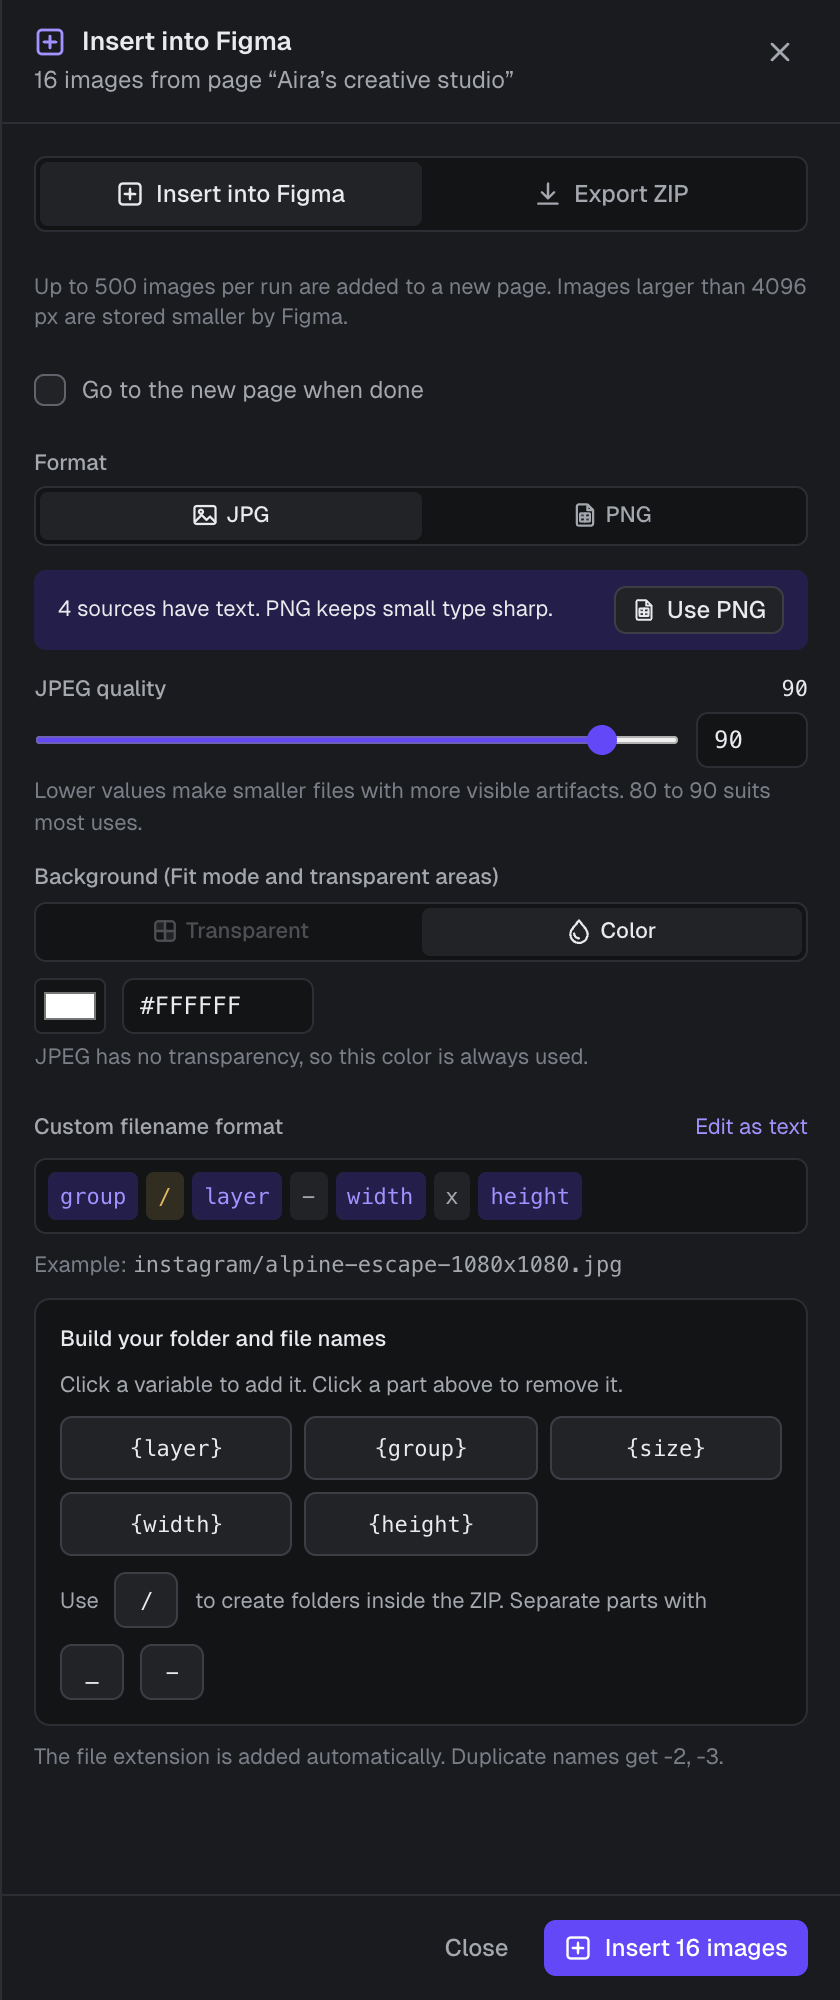
- Croppy adds a new page named like
Croppy export 2026-10-16 14:30. Your original layers are not changed. - Images are grouped into one frame per size group, such as Instagram or Print, and laid out in rows.
- Each image layer is named after the file part of your file name pattern, without folders or extension.
- Tick Go to the new page when done to jump to the results.
- Up to 500 images can be inserted per run.
Export ZIP
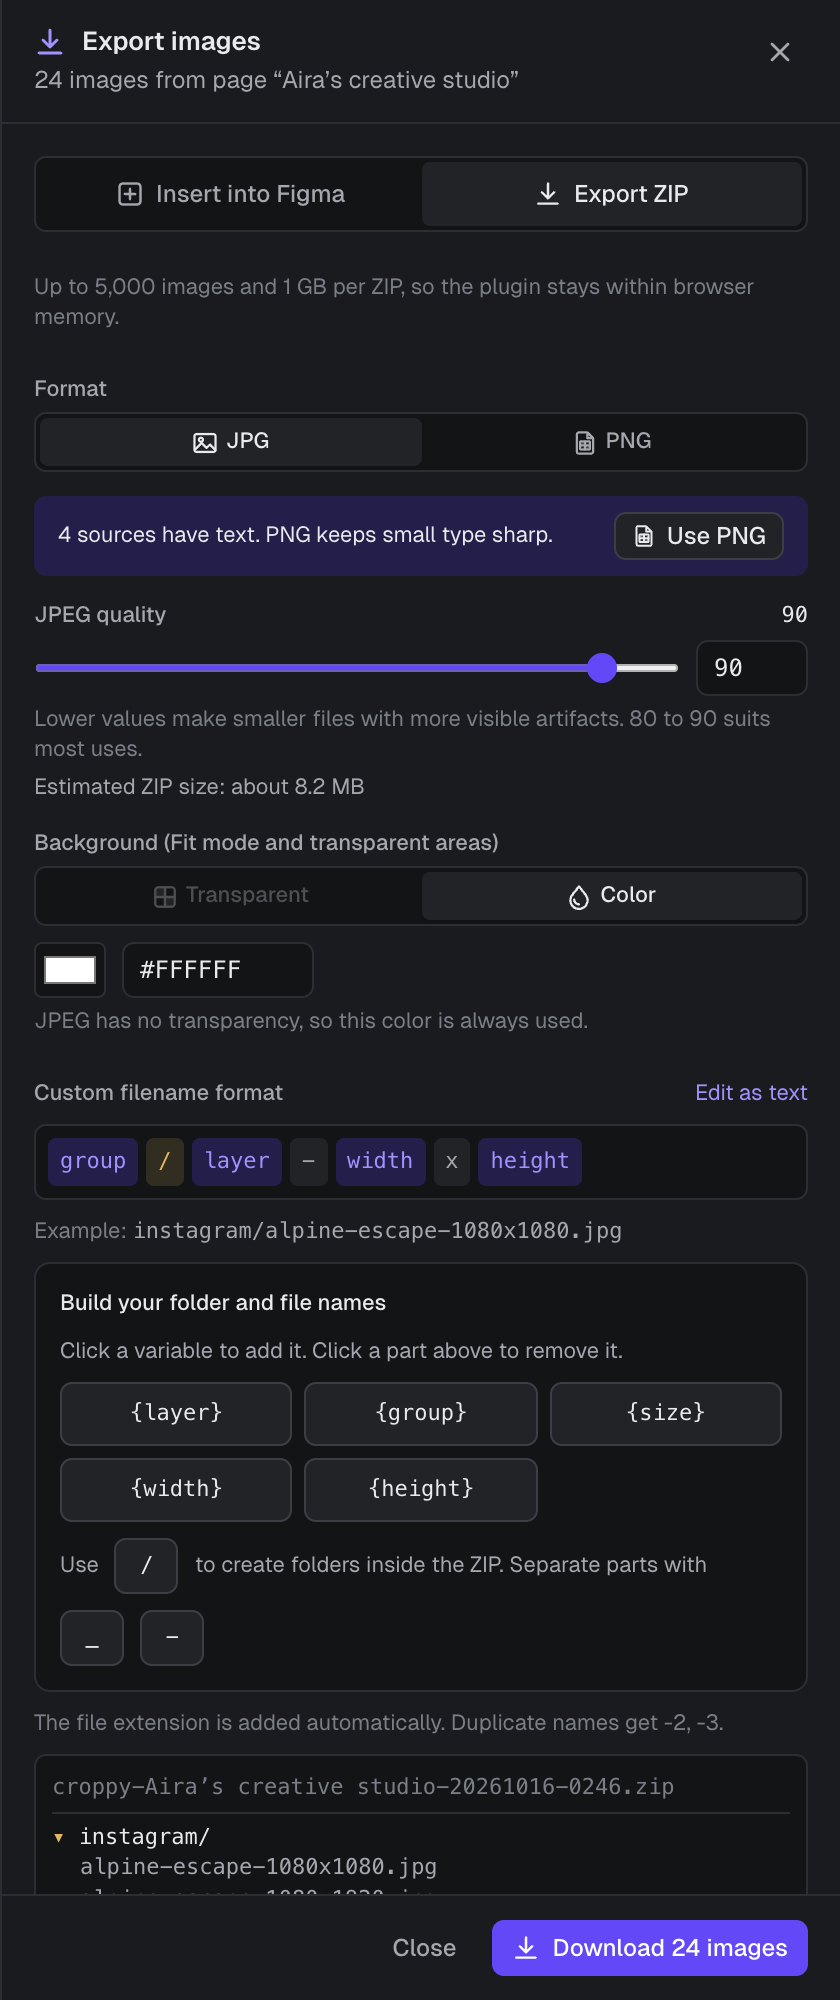
- The ZIP is named after your page and the time, such as
croppy-Campaign-20261016-1430.zip. - A preview lists the folders and files inside the ZIP before you download.
- Each ZIP holds up to 5,000 images and 1 GB.
Format and quality
- JPG makes small files and suits photos. Set JPEG quality from 1 to 100. It starts at 90, and 80 to 90 suits most uses. Above 95, files get much larger with no visible gain. For ZIPs, Croppy estimates the download size.
- PNG keeps every pixel and supports transparency. For ZIPs, choose Fast or Balanced compression. Both are lossless. Balanced makes smaller files but takes longer, and Croppy estimates the size and time of each.
- If any selected source contains text, Croppy suggests PNG, which keeps small type sharp. Click Use PNG to switch.
Background
The background fills the empty space around images in Fit mode, and any transparent areas. Choose Color (white to start) or, for PNG, Transparent. JPG cannot store transparency, so it always uses the color.
After the run
Croppy confirms how many images were inserted or downloaded. During the free trial, each finished run uses one of your 10 runs. Your format, quality, background and file name choices are saved on the current Figma page.